Hand-rearing and rehabilitation of Plum-headed parakeets, contd.
Devna Arora
Link to Page 1: general guidelines
Stage-wise care of plum-headed parakeet chicks
| Age in weeks | Diet until weaning | Feeds/Day | Average daily intake |
| 0-1 week | Formula | 8-9 | 2 ml |
| 1-2 weeks | Formula | 7-8 | 5 ml |
| 2-3 weeks | Formula | 5-7 | 10 ml |
| 3-4 weeks | Formula | 5-6 | 15 ml |
| 4-5 weeks | Mash | 5 | 20 ml |
| 5-6 weeks | Mash | 4-5 | 30 ml |
| 6-7 weeks | Mash/Chopped | 4-5 | 50 ml |
| 7-8 weeks | Weaned | 4 | - |
Stage 1: Nestling – unfeathered
Characteristics: Baby parakeets are born completely naked with their eyes closed and are completely dependent on their parents for food, warmth and care. Baby birds not only lack insulation but thermoregulation is also poorly developed at this stage and they need an external source of heat at all times. In nature, the female parakeet incubates the chicks for the first couple of weeks of their lives until they are adequately feathered.
The baby’s eyes open by the end of the first week and pin feathers begin to erupt at the same time. A coarse layer of down feathers also begins to erupt in the second week of the chick’s life.
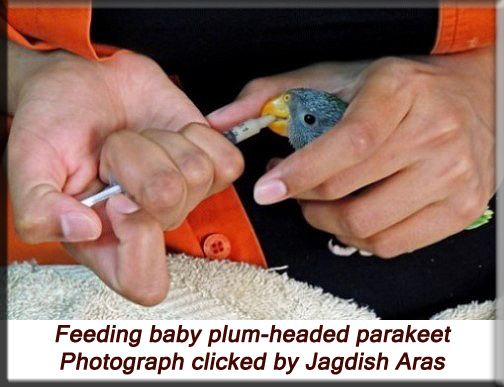
Feed: The digestive system of new-born chicks is very delicate and they must only be fed soft and easily digestible foods to begin with.
Composition of formula for naked nestlings:
1. 50% infant cereals like Nestum (which is without milk).
2. 25% of fruit (skinned and pureed) – banana being the primary fruit component in week one and other soft fruits like figs, muskmelon, grapes and pomegranate being introduced in the 2nd week of its life.
3. 25% of boiled egg yolk, with nut butters being introduced in the second week of the chick’s life.
4. The feeds may be diluted a wee bit, if required, by adding fresh squeezed fruit juices – juicy fruits like grapes, muskmelon and pomegranates are excellent for the purpose.
The fruits must all be skinned and the formula must either be blended in a mixer or you can run it through a fine sieve but the latter, although convenient for smaller quantities, takes a bit of time and effort. The formula must be very fine and smooth as the chicks are likely to be fussy if offered a coarse or grainy formula.
A batch of Nestum and egg yolk may be made for the entire day with only the required quantity being warmed for each feed – ensure to discard all remaining feed once it has been warmed. Fruits must be added fresh to each feed.
Once the chicks have settled and are accepting the feed well, ¼ drop of vitamin and calcium drops must be added to at least 2 feeds a day to begin with and gradually increasing to ¼ drop in 3-4 feeds of the day by the end of the second week. Probiotic supplements too must be added – a tiny pinch of powder added to 3-4 feeds is adequate for chicks at this age.
The chicks do not require any additional water at this stage as they get the required amount through their feed.
Feeding quantity and frequency: Feeding must begin at dawn and continued till about mid-night. The chicks must be given 8 feeds a day for the first couple of weeks of their life. A new-born chick will consume barely 2 ml of formula in an entire day whereas a week-ten days old chick will consume up to 5 ml of formula in one day.
Special care: Naked nestlings require additional warmth throughout the day even when housed at room temperatures. The ambient temperature should be maintained at 99-100˚ F at this stage. They must be kept on soft bedding as their skin is very tender at this stage – a lining of soft cotton cloth may be preferable to paper towels at this stage. Refrain from using fleece or cotton towels.
Stage 2: Nestling – feathered
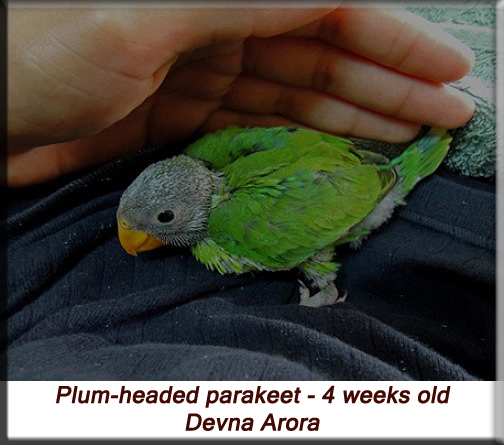
Characteristics: The chicks are fairly feathered, with tiny feathers covering the bulk of the body by the end of the 3rd week and completely feathered by the end of the 5th week. Pin feathers also erupt on the chick’s head covering the head in greyish-green plumage by the end of the 5th week. They are likely to be shy and disinclined to move around at this age as they would still be in the nesting cavity at this age. Shy chicks may prefer to be covered even when you feed them.
Feed: The chicks will continue to have a similar diet at this stage but the proportion of Nestum can be decreased and that of fruits increased.
Composition of formula for feathered nestlings:
1. 30-50% banana.
2. Up to 20% of other fruits (skinned and pureed) – figs, muskmelon, grapes, papaya and other soft fruits.
3. 25% of infant cereals like Nestum (which is without milk).
4. 25% of a combination of boiled egg yolk and nut butters – I personally prefer a mix of sesame and cashew butter. Egg white must be introduced once the chicks start eating mashed egg.
5. The feeds may be diluted with fruit juices when syringe feeding but older chicks will happily eat mashed egg and fruits. Nestum can be discontinued once the chicks are eating mashed foods.
½ a drop of vitamin drops and calcium drops and a pinch of probiotics must be added to three alternate feeds every day.
Feeding quantity and frequency: The chicks can be given 5-7 feeds a day when they are 3 week old, reducing to 5 feeds once a month old. Feeding must begin at dawn and can be continued till about 10 pm.
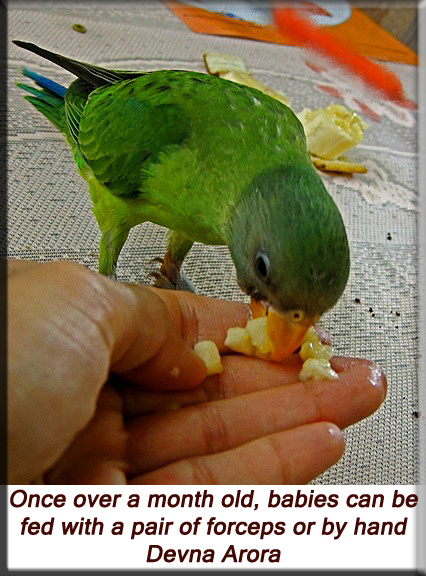
On average, the chicks will consume up to 10 ml a day in the 3rd week and 15 ml a day in the 4thweek. Once they are a month old, the chicks can be shifted to mashed foods instead of syringe feeding formula. The chicks will consume 4-5 tsp (up to 20 ml) of mashed foods in the 5th week and 5-6 tsp (up to 30 ml) of mashed foods in the 6th week.
Special care: External heat may be discontinued in the afternoons in the 4th week and gradually discontinued during the day once the chicks are over a month old. The nestlings will nevertheless require external heat at night well until after they have fledged. The ambient temperature may be maintained at 98˚F for the chicks at this stage.
Stage 3: Fledgling – dependent upon parents
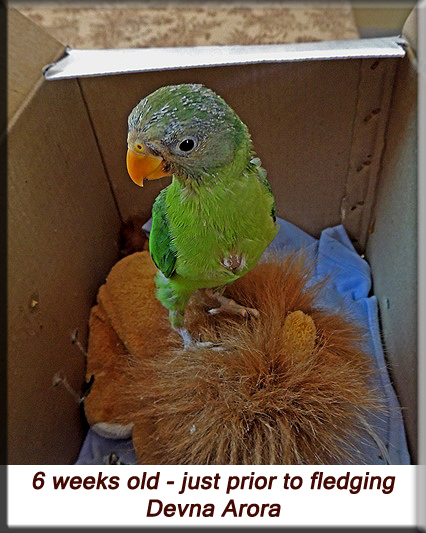
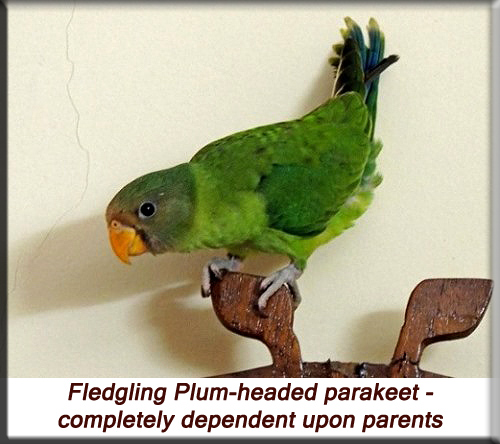
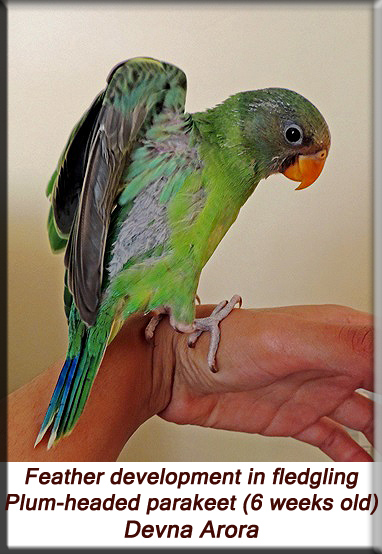
Characteristics: Contour feathers rapidly develop once the chicks are a month old and they fledge by the time they are six weeks old. The chicks are extremely curious, mobile and active at this age. They will not only practice their take-offs and landings but also enjoy practicing their grip and climbing onto things. The young birds must be shifted to aviaries with lots of climbing perches at this stage.
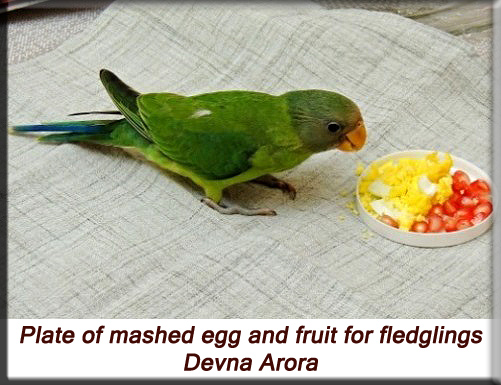
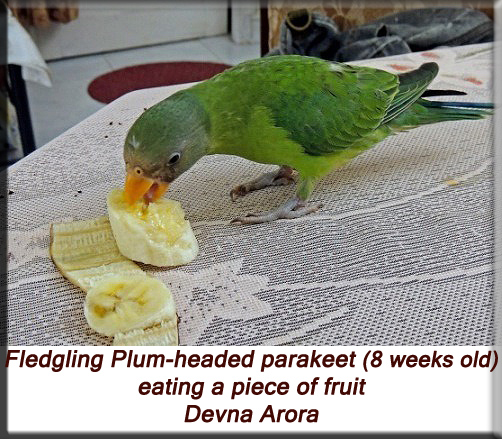
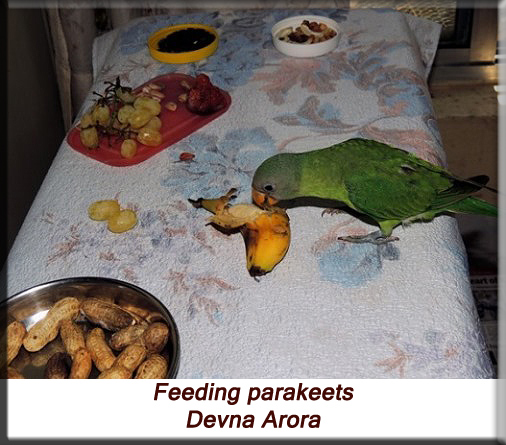
Feed: The chicks will now readily accept small cut pieces of fruit and a variety of foods must now be introduced: banana, grapes, guava, figs, muskmelon, water melon, apricots, cherries, pomegranate, jungle jalebis (Pithecellobium dulce), sprouted grams, etc. Large pieces of fruit must also be given intermittently as it will encourage the chicks to bite into larger fruit as they would in nature. They will also begin to eat seeds and nuts and must be encouraged by providing hulled seeds and nuts in the beginning. Sesame seeds, millet, shelled groundnut (fresh), cashew nuts, walnuts and other hulled seeds are great at this stage. Vegetables like peas, beans, broccoli, spinach, etc. must also be introduced at this stage.
Mashed boiled eggs are an essential component of the chick’s diet and must be given at least twice a day – a chick may consume a quarter to half an egg each day. A bowl of fresh water must be available for the chicks at all times as they will now start drinking water.
Feeding quantity and frequency: The chicks will have 4-5 feeds a day and consume roughly 6-7 tsp of food, equivalent to a medium-sized banana plus some egg each day at this stage. Feeding must begin at dawn and cease at dusk – the chicks must now fall into a diurnal pattern. The chick’s appetite may temporarily drop at the time of fledging as the chicks instinctively lose weight to reach optimum flying weight. [Baby birds are heavy as they need to store energy to grow but a bird must be light enough to be able to lift and fly.] Their appetite returns once they have come down to optimum weight.
The chicks must be encouraged to eat on their own and hand-feeding should have been stopped by the time they fledge. Intermittent hand-feeding may be continued for a week or two after fledging until they chicks are consuming adequate quantities themselves.
Special care: The chicks must be shifted to an aviary on fledging. The aviary must have lots of closely connected branches/perches; being equipped with prehensile claws and a powerful beak, parakeets love to grip and climb – this is an essential part of their feeding behaviour.
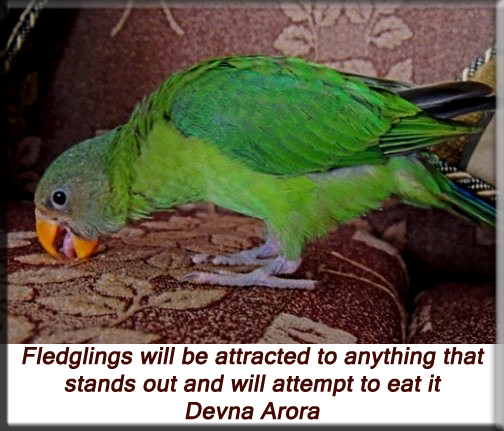
Care must be taken to prevent the young birds from ingesting anything harmful as they will attempt to eat anything bright that stands out.
Although they shouldn’t require external heat anymore, the young birds must be given warm roosting spaces or nest boxes at night – essentially, they need something to block off the cool breeze at night until they are a little older. Alternatively, they may be shifted indoors each night for the first couple of weeks after fledging.
Stage 4: Juvenile birds
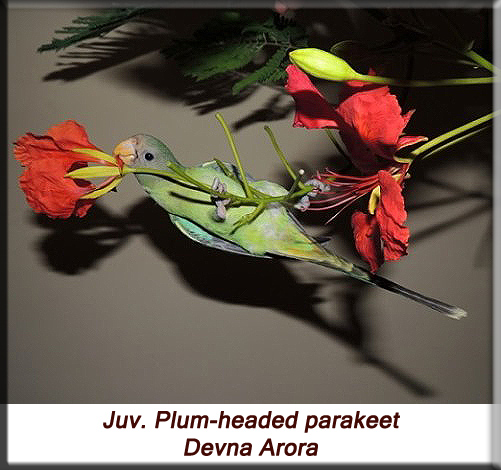
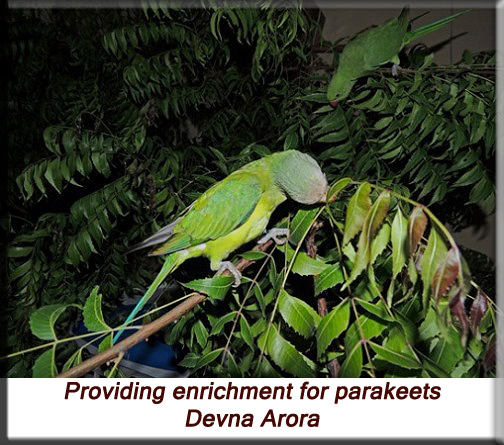
I would classify birds beyond 3 months of age as juvenile birds. They undergo a minor moult at this age and get a new set of feathers in 6-7 weeks but still retain their juvenile plumage. Birds at this age are very active, inquisitive and full of life. They are also very agile and will be flying well with sharp twists and turns. They must be shifted to large aviaries – at least 15 x 25 ft. and 15 ft. high, with lots of enrichment.
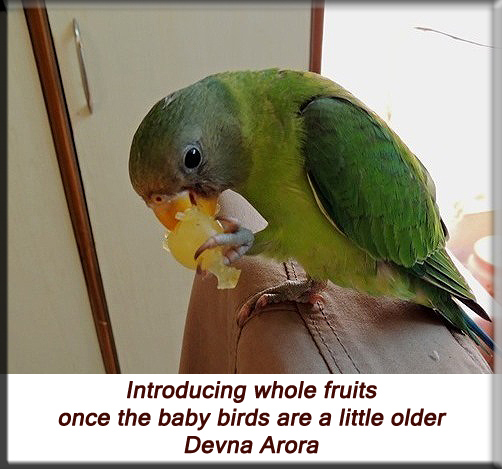
Feeding: The chicks will now consume an adult diet. Fruits must be offered whole as far as possible. Larger fruits like apples, guavas, etc. can either be hung up or cut into 1-2 inch sticks or slices that the birds can fly away with and eat on their perches.
The birds should be given a combination of 1-2 fruits, 1-2 vegetables and 1 leafy vegetable every day. A bowl of seeds (refilled at least twice a week) must be available at all times and nuts may be offered a couple of times a week. Fresh groundnuts and grains for example, corn on the cob, must be offered whenever available as they thoroughly enjoy them both. Foods must be alternated to keep their diet from becoming monotonous.
Rehabilitation and Release
The young birds must be must be shifted to an aviary at the time of fledging and given plenty of flight exercise before release. This is essential for them to develop the agility and swiftness required for survival. The aviary must be at least partially sheltered so the birds are not directly exposed to harsh sunlight and rain. The aviary must also have a couple of nest boxes, hung high in the aviary, for the young birds to roost in.
Food at this stage must not be offered in one place but scattered around so the young birds learn to search for it. A variety of foods and preferably wild picked foods must be offered to prevent dependence on any one food type. Fresh drinking water and a larger shallow bowl of water to bathe in must be available at all times.
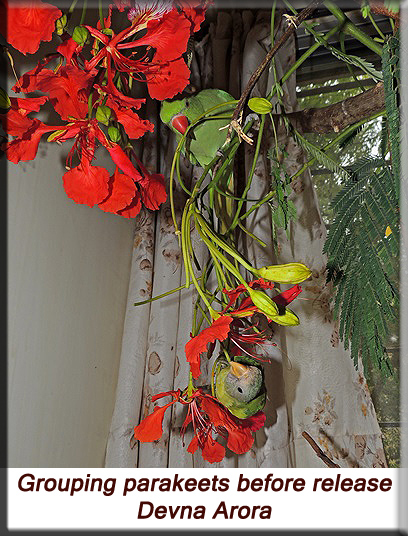
The first step towards getting your bird ready for release is to break the young bird’s dependency on human beings, group it with other parakeets and to give it maximum opportunities to be in tune with and enhance its natural instincts. The process of rehabilitation must actively start by the time the chick fledges and followed meticulously until release.
Important things to be kept in mind when releasing Plum-headed parakeets:
1. Place of release and the presence of other conspecifics
Wherever possible, all rescued animals must be released where they have been picked up from. This is particularly important when releasing animals that have been admitted as adults so they can have the chance to go back to a familiar environment and reunite with their flocks.
Younger birds must be released in suitable locations with ample fruiting and seeding trees and naturally occurring populations of the species. Plum-headed parakeets are social species and young birds must be rehabilitated (in-situ if possible) and released in proximity to wild flocks so they may at least follow the wild birds if not integrate into their flocks.
2. Grouping before release
Parakeets are extremely social birds that live and breed in small flocks. They are also long-lived birds and the young ones are dependent on the parents for long periods of time. Being social in nature, they thrive in the company of other parakeets.
Grouping is also extremely beneficial for hand-raised birds as its takes the young bird’s attention off the foster parent and minimizes the extent of bonding with the caretakers – this is an important step towards independence and release.
As plum-headed parakeets aren’t often rescued in great numbers every season, there may be not always be enough birds to group them with, in which case, they may be grouped with any other parakeet species that are found in their natural distribution range. A group may be of minimum 3-4 birds to as large a group as can be accommodated in the aviary.
Baby parakeets of different species may be hand-raised separately and grouped together upon fledging. Care must be taken when introducing Plum-headed parakeets to other parakeets. Since they are gentler in nature and much smaller in size, the plum-heads may easily get bullied by bigger and more aggressive birds. They must be introduced to each other slowly and left in the same aviaries only once the smaller birds are able enough to safely move away from the bigger ones.
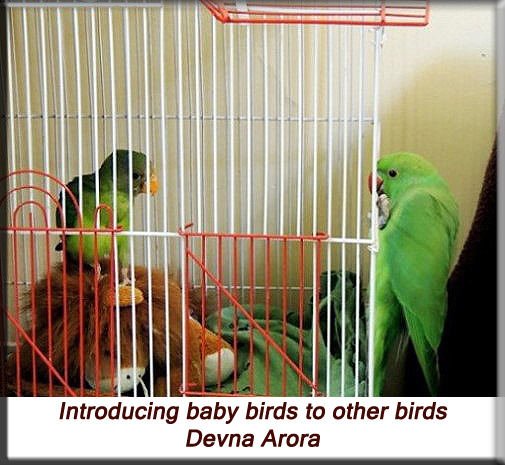
A simple way of introducing birds to each other is by keeping the new or younger birds in a cage and letting the others greet them across the bars – this is particularly helpful when introducing younger birds and ensures they are not harmed by any bigger ones. It also helps them to gauge the other bird’s personality, establish a hierarchy and judge the distance each bird needs to maintain with the other.
Presence of wild parakeets
If opting for in-situ enclosures, the aviaries itself may attract wild other parakeets. They may be given treats occasionally to encourage their visits to the aviaries as the presence of wild parakeets will greatly benefit the young birds under rehab. If the movement of wild parakeets is frequent enough, there’s also a good chance that the young birds will follow them after release and potentially integrate into their flocks.
Squabbling and chasing
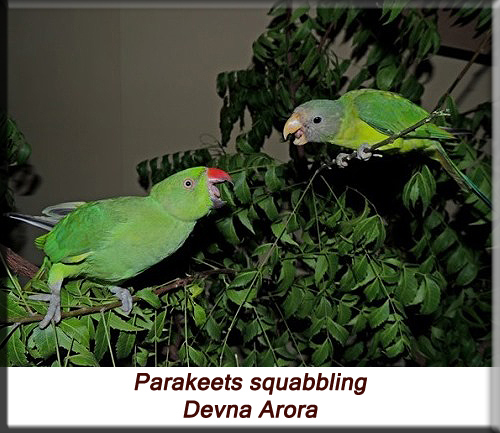
Some amount of squabbling and chasing is normal in any social species. In most cases, it is simply a way of setting limits and establishing hierarchy and dominance. Hyperactive birds are likely to be of greater nuisance as they tend to pester other birds but it should be of little concern as long as the younger birds are not hurt. I personally find this to be a good exercise in survival as the young birds will be exposed to many more grave threats once they are released.
3. Age and timing of release
Birds that have been admitted as sub-adults or adults may be released just as soon as they are ready to be released. The only consideration for them is fitness for survival.
Baby birds that have been hand-raised, on the other hand, need to go through a slower and more cushioned method of release. Young parakeets must only be released after they are 5-6 months old if opting for a soft release whereas those that are being hard released must only be released after they are 6-7 months of age.
4. Method of release
Hard Release is a means by which the animal is released into a new location without its being accustomed to the new environment. Although this method is most appropriate for animals that have been admitted as adults it is also safe for young birds that are being released in groups.
Soft Release is a means by an animal is gradually introduced or familiarized to a new environment before its release into that location. Hand-raised animals are at a disadvantage of not having had adequate parental learning and always benefit from additional safety and protection during release, hence maximizing their chances of survival.
The young birds may be shifted to in-situ aviaries by the time they are 3 months old. The aviaries must have an opening high up to either sides of the aviary which can be opened once the birds are 5-6 months old, thus allowing the birds to freely fly in and out of the aviary. The opening must be made in a way that it prevents the entry of terrestrial predators like rats, cats, dogs, snakes, etc.
Young birds at this age seldom venture far from the aviary and frequently return for titbits during the day and to roost at night. Once they have explored their surroundings and have found safe roosting spaces for themselves (typically in a few weeks), they will cease to return to the protection of their aviary but may return for titbits of food. Eventually, they will become completely independent and cease to return to the aviary at all. Supplemental feeding must be continued for a couple of months until the birds are independent and may be ceased once the birds are self-sufficient.
Acknowledgements
I thank Jagdish mama for taking these lovely photographs of my baby birds and helping me document their hand-rearing process.
I extend a heartfelt thanks to Corina Gardner for being a constant pillar of support! I have learnt so much about parakeets from you and it means a lot to me that you are always just a phone call away.
Corina, thank you so much for your kind words on the draft for Plum-headed parakeets. It truly means a lot to me that the final draft was reviewed by you, thank you!
References
Arora, D. (2013) A photographic guide to baby parakeet hand-raising, care and behaviour, Rehabber’s Den [Online] Available from:
http://rehabbersden.org/A%20photographic%20guide%20to%20baby%
20parakeet%20hand-raising,%20care%20and%20behaviour.pdf [Accessed: 26/03/2013]
Arora, D. (2013) Feeding parakeets in captivity, Rehabber’s Den [Online] Available from:http://rehabbersden.org/Feeding%20parakeets%20in%20captivity.pdf[Accessed: 04/07/2013]
BirdLife International (2012) Psittacula cyanocephala. In: IUCN Red List of Threatened Species. Version 2013.1 [Online] Available from: http://www.iucnredlist.org/details/106001535/0[Accessed: 13/07/2013]
Blanford, W.T. (1895) The Fauna of British India, including Ceylon and Burma: Birds – Vol. III, Taylor and Francis, London, pp. 251–252.
Farrell, J. H. (2007) Breeding the plum headed parrot, Parrot Society of Australia, News 11 [Online] Available from: http://www.parrotsociety.org.au/images/magazinelinks/PSOANovDec07-1.pdf [Accessed: 09/04/2013]
Gardner et al. (2012) Rehabilitation of baby Ring-neck parakeets (Psittacula krameri), Rehabber’s Den [Online] Available from:http://rehabbersden.org/Rehabilitation%20of%20baby%20Ringneck%
20parakeets.pdf [Accessed: 03/07/2012]
Indiviglio, F. (2011) The natural history and captive care of the plum-headed parakeet [Online]. Available from:http://blogs.thatpetplace.com/thatbirdblog/2011/10/11/the-natural-history-and-captive-care-of-the-plum-headed-parakeet/#.UeFHrEFkOSo [Accessed: 13/07/2013]
Parrot Feather (undated) Plum-headed parakeets [Online]. Available from: http://www.parrotfeather.com/asiatics/plumheadedparakeets/[Accessed: 13/07/2013]
Phelps, C. (undated) Baby plummies [Online] Available from: http://www.birdnanny1.com/id16.html[Accessed: 13407/2013]
Rasmussen, P. C. and Collar, N. J. (1999) On the hybrid status of Rothschild’s parakeet Psittacula intermedia [Online] Available from: http://people.ds.cam.ac.uk/cns26/njc/Papers/Psittermedia.PDF[Accessed: 01/06/2013]
Speer, B. (2007) Parrots In: Gage, L. J. and Duerr, R. S. (2007) Hand-rearing birds, Blackwell Publishing, Pp: 243-254
Young et al. (2011) Survival on the ark: life-history trends in captive parrots, Animal Conservation [Online] Available from: http://biology-web.nmsu.edu/~twright/publications/Young2011AnimConserv_ZooParrot
Lifespans.pdf [Accessed: 13/07/2013]
Protocol published in 2013

