Hand-rearing and rehabilitation of Plum-headed parakeets
Devna Arora
The Plum-headed parakeet
The plum-headed parakeet Psittacula cyanocephala is a smaller sized parakeet that is native to the subcontinent of India. Although less popular as a pet bird than other parakeets, escaped birds have been seen in many parts of the world. The species inhabits woodlands but is often seen frequenting farms and orchards in both rural and suburban areas.
Plum-headed parakeets are happy, gregarious birds commonly seen in flocks of varying sizes. They breed in small colonies even though the male may be highly territorial and protective of his own nest. They readily mix with other parakeets (both, in captivity and in the wild) and are commonly seen in mixed flocks with several other species of parakeets. The species is also known to breed with Slaty-headed parakeets in the wild and Ring-neck parakeets in captivity.
Plum-headed parakeets are known to live up to 20 years in captivity. They breed from Feb and May laying a single clutch of 3-4 eggs in the cavities of trees. Chicks are actively cared for by both parents and remain with the parents for at least a few months after fledging.
Need for assistance
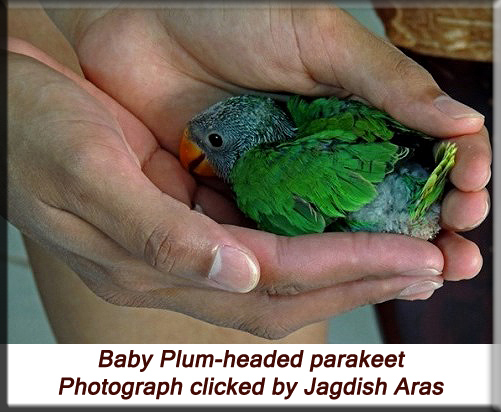
Chicks are most commonly admitted as rescues from the illegal pet trade. Finding fallen nests is unusual unless the nesting tree has itself been felled or has fallen. An artificial nest may be hung close to the original nesting tree if the tree has been felled. The nest must be observed from a distance to ensure the parents have returned to the new nest and have started feeding the chicks. If not, the chicks must be hand-reared.
The chicks may also be found during the fledgling stage when they either jump out of the nest too soon or are unable to keep up and land in unsafe locations. In most cases, the parents will be close-by, keeping an eye on the chicks and feeding them wherever they are, thus requiring no human intervention. Ensure from a safe distance away (so as not to scare away the parents) that the chicks have been unfed or unattended to for at least a few hours before attempting to rescue them.
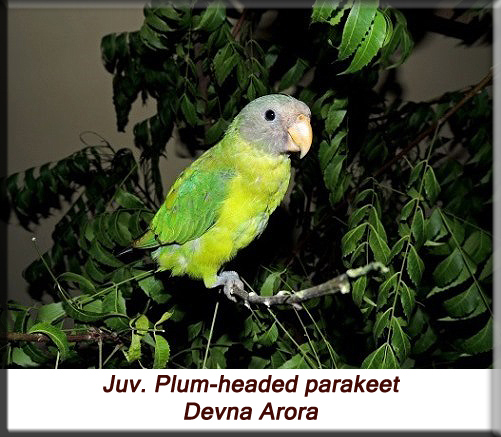
Sexing plum-headed parakeets
Adult male and female plum-headed parakeets are strikingly different in plumage. The male has a black chinstrap and ring around the neck with a striking plum-coloured head while female has a duller bluish-grey head and lacks both the black chinstrap and the ring around her neck. Male and female juvenile parakeets have similar plumage but can be sexed after they are a year old – once they obtain their adult plumage.
Plum-headed parakeets are extremely social birds that easily get along with other birds and both male and female parakeets can easily be easily housed in mixed flocks.
Guidelines for hand-rearing plum-headed parakeets
Hygiene
The chicks must be kept in extremely hygienic conditions until they are ready to fledge as young chicks are susceptible infections. Their bedding must be kept clean and changed as often as required. Hands must be washed every single time before handling the baby birds. Excessive handling of the chicks must be avoided and they must only be handled during feeding times, although in most cases, it will be absolutely unnecessary to touch the chicks when feeding them.
Chicks will defecate several times through the day. In most cases, you should be able to remove the droppings and the bedding may only be replaced a couple of times a day. But if you are unable to pick the droppings, then the bedding must be changed every few hours to prevent the droppings from sticking to the chick’s feathers and skin. Droppings harden after sticking to the body and are extremely painful to remove and inevitably peel off with a bit of skin, exposing raw skin to bacterial infections. The bedding must also be checked 2-3 times a day to ensure the chicks always have dry bedding as moist bedding too can lead to infections.
Although young chicks judiciously preen their feathers and remove the casings of the pin feathers, they are unlikely to clean their beak or feathers of any food residue. They must therefore be wiped clean promptly after every feed. Food residue left on them will stick to the body inviting bacterial infections and fungal growth and it will peel back with feathers if forcefully removed after it hardens – this must be avoided.
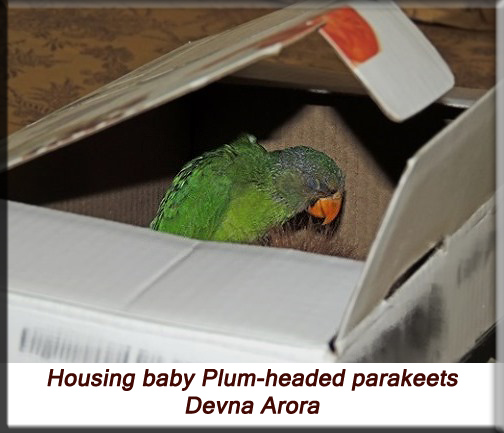
Housing
Baby parakeets must be housed indoors in small boxes or baskets. Their bedding can be lined with soft cotton cloth or paper towels which are easy to replace once soiled. Refrain from using cotton towels as their nails get caught in the cotton loops, proving to be extremely uncomfortable for small chicks. Cotton wool too must never be used for chicks as it accumulates the droppings and sticks to the chick’s legs and feathers; plus, the cotton fibres can be inhaled causing breathing distress and they are mighty irritating when they stick to the face.

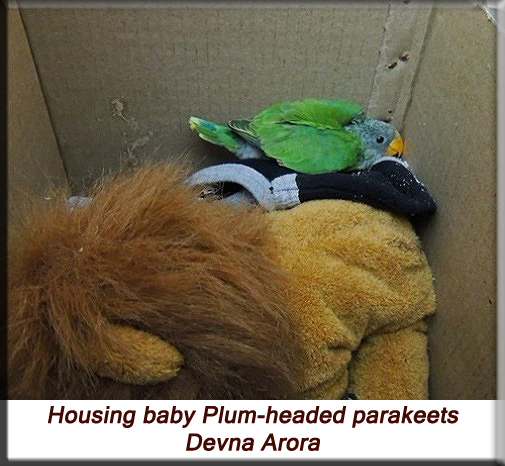
Lone parakeet chicks may be given stuffed toys as they will prefer snuggling next to something soft. Although the lid of the box must always be closed, younger and shy chicks may prefer hiding under a fold of cloth which doesn’t weigh down on them.

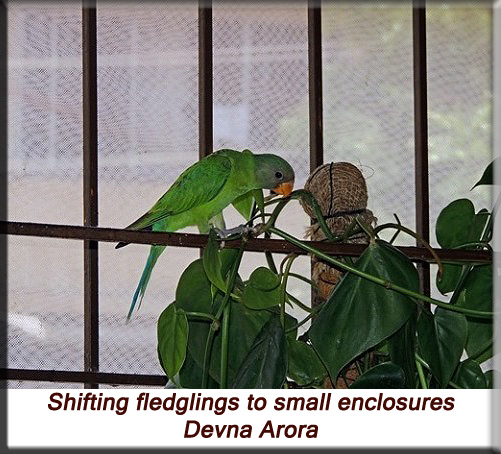
The chicks may be shifted to indoor cages (for 1-2 weeks at the most) once they are nearing fledging age, unless they seem shy and prefer to be in covered spaces. Cages are particularly helpful when integrating younger chicks with other birds. For more details, please refer to the paragraph on grouping on page the next page.
The chicks must be shifted to an aviary upon fledging. A small aviary, roughly 10 X 10 ft. and 8-10 ft. high, is adequate for fledglings. Young birds beyond the age of 3 months must be shifted to large aviaries, minimum 15 x 25 ft. and 15 ft. high, for adequate flight practice before release. The aviary must be equipped with several perches and preferably a couple of trees but must also allow the young birds to fly about freely and exercise their fight muscles.
Inter-species interactions
The chicks must never be house in close proximity to predatory species like crows, hawks, cats or dogs. Housing the chicks in close proximity to such species will either lead to constant stress due to the smells, sounds and movements of the predators; or it will lead to habituation and lack of fear and decrease their chances of survival after release.
Imprinting and dependency
Imprinting is a process whereby a young animal learns and imitates the behaviour traits of its parents. It serves as an indirect method of instilling the appropriate behaviour and survival traits in young animals.
Under the unnatural conditions of captivity, the chicks may imprint on humans and other animals they are constantly exposed to. To prevent this, they must never be handled excessively or exposed to too many people and animals, and handling must cease once the chicks have fledged. This also keeps them from being dependent on the caregivers.
Parakeets are social species and tend to become both very attached and dependent on the keepers in the absence of other parakeets. To prevent this, they must always be housed with other parakeets – same or different species.
Warmth
New-born chicks require additional warmth until fledging to maintain their body temperatures. They must always feel slightly warm to touch. As a rule of thumb, the smaller the chick, the more warmth it will require. Unfeathered chicks will require external heat all day long. The intensity of heat required will gradually reduce as the chicks become adequately feathered and discontinued upon fledging. Fledglings must nevertheless be housed in warmer spaces until they have thicker plumage.
External heat may be provided in the form of incubators, heating lamps or hot-water bottles. Most breeding and rescue centres are equipped with incubators and prefer the same for baby birds. It is easiest to both control and monitor the temperature of the nest chamber when using incubators. But these may not be easily available to individual rescuers, in which case, alternate methods of providing external heat may be used.
Heating lamps adequately serve the purpose of providing heat for nestlings. The distance of the heating lamp from the box will depend upon the wattage of the bulb and the body condition of the chicks. Chicks that get too warm will pant to decrease their body temperature. If such behaviour is noticed, external heat must be reduced and ventilation increased immediately to prevent over-heating. The box must be covered with a cloth at night to prevent the light of the lamp from falling directly on the chicks and interrupting the natural circadian rhythm of the chicks.
Hot-water bottles may also be used for the chicks and are safe to use with smaller birds. The bottle, wrapped in a couple of layers of cloth, must be placed under the chick’s bedding and it must be ensured that the chicks cannot come in direct contact with the bottle as they will scald if they do. Hot-water bottles must only be placed under half of the chick’s bedding leaving them the flexibility to shift to the uncovered part of the box if they get too warm. Hot-water bottles may even be placed just outside the box while still touching the box to ensure adequate warmth.
Water and hydration
Baby birds are seldom given water orally. They receive adequate water through their feeds. Baby birds must be offered soft and moist foods as it both assists digestion and ensures sufficient hydration. Mild dehydration may be addressed by offering the chick softer foods or formulas until dehydration has been addressed. To help restore the electrolyte balance in dehydrated chicks, rehydration electrolytes may be added to the formula. Refrain from administering water orally as the risk of water going down the trachea and aspirating the chick is high. If severe dehydration exists, the chick may be given fluids subcutaneously but this must only be done by an avian veterinarian. Such chicks must be fed only after dehydration has been addressed.
Baby birds that are dehydrated will appear weak and listless. Their skin, especially around the breast and stomach, will appear tighter and wrinkled. The skin turgor test or the ‘tent test’ may also be used to assess dehydration. Well hydrated chicks, on the other hand, are soft to touch and appear rounded and well. They will also be a lot more active and interested in movements around them than dehydrated chicks.
Feed and formulas
The chicks must be fed 6-8 times a day for the first two weeks of their life and then every 3-4 hours until they fledge. Feeding must begin at dawn and the last feed can be given by midnight. If feeding several chicks, you must ensure that all chicks are well fed as the runts or weaker chicks often get pushed aside and may consequently get weaker if not given adequate attention.
Hand-rearing formula
Baby parakeets can be hand-raised on soft fruits which make up the bulk of the diet. Proteins must constitute about 20% of the feed and can be provided in the form of boiled eggs and seeds (ground to a paste).
Combination of foods for the hand-feeding formula:
[For more details, please refer to ‘stage-wise care’ on the next page.]
• Banana is an excellent base food for the formula – it is both nutritious and easily digestible. 50% of the chick’s diet can comprise of banana during the hand-feeding stage.
• Figs, muskmelon, grapes, pears, and other soft fruits can together comprise 25% of the diet. I prefer using a different fruit each day.
• Boiled egg (egg yolk for babies and both yolk and white for fledglings) is an excellent feed option – it is a good source of protein and is high in natural fats and minerals and can make up 10-15% of the formula during the hand-feeding stage. Older chicks may prefer a higher proportion of egg and may be allowed to eat as much as they prefer.
• Nut butters or seeds ground to a paste are a great source of fats and proteins and can comprise 10-15% of the formula. I personally prefer using a combination of sesame (high in calcium) and cashew nuts to which I add some glucose and run to a paste in the blender. Refrain from using commercially available nut butters as they are high in sugars, salt and preservatives.
• Instead of using water, fresh squeezed juice of fruits like grapes, pomegranates, muskmelon, papaya, etc. may be used to dilute the feeds if required. This is a great way of adding natural sugars and vitamins to the diet.
• A feed of just fresh juices may be given if you find that the crop has not emptied properly and the chick is reluctant to feed.
• Infant cereals (without milk) too may be added to the formula, esp. for neonates, but in my experience, they refuse to eat it once they are old enough to protest, typically around fledging age.
Avian vitamins and calcium supplements must be added to the formula for baby birds. The next best choice to avian supplements (if none available) would be other veterinary or paediatric vitamin drops – choose a supplement with added minerals too. Most multivitamin combinations do not include calcium and this must be supplemented as well – veterinary calcium drops are a good option. Probiotics too may be added to the chick’s diet. Avian probiotics are of course the first choice but human or veterinary probiotics, for example, Gutwell, too are extremely helpful. A pinch of probiotics in alternate feeds should suffice most babies.
Consistency of the formula
Baby birds are given a formula consisting of pureed fruit and mashed eggs or ground seeds. It is easiest to feed them with a syringe for the first few weeks of their life. Once the birds are nearing fledging age, they can be fed small boluses of mashed fruit and egg/seed either by hand or with a pair of forceps. Fledglings will comfortably takes pieces of fruit with a pair of forceps and will soon pick up pieces of fruit from a plate.
The consistency of the formula should be similar to that of a soft pudding – neither too thick, which would make it difficult for the baby to swallow and it may choke; nor too diluted as the baby could inhale the formula into its lungs causing aspiration. Fresh formula must be used for each feed and any leftover formula must be promptly discarded.
The chicks must be fed warm formula just as mammalian young are given warm milk. Formula that is too hot will scald the baby bird’s crop and oesophagus, causing crop burn. Cold formula, on the other hand, will slow the process of digestion and cause ‘sour crop’. Sour crop is a condition in which the formula in the chick’s crop has gone bad as the contents of the crop have not emptied.
Once the chicks have fledged, fruit pieces must be offered at room temperature. Refrain from offering refrigerated fruits, rather, let the fruit come up to room temperature for an hour before offering it to the chicks.
Feeders
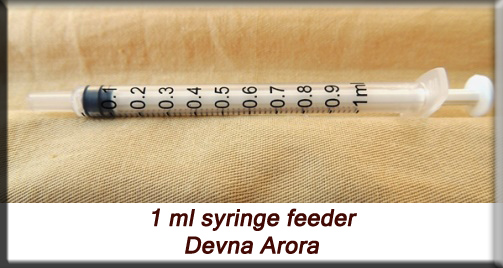
Feeding syringes are required for feeding formulas as formulas are much too soft to be picked up with the forceps or by hand. Syringes however must either be discarded or sterilized after every use. I prefer using a fresh 1 ml tuberculin syringe for each of the feeds – the feed quantity suffices baby plum-headed parakeets. The 1 ml syringes are difficult to sterilize as the plastic is too soft and easily loses shape and must hence be discarded after every feed.
Bigger syringes (2 ml onwards) can be sterilized with ease. However, I don’t find them practical for thicker formulas as the outlet is narrower than in 1 ml syringes. [They are great for mammalian milk formulas.] The syringes must be rinsed to wash off any feed residue and then boiled in boiling water for 5 minutes to sterilize it. Not sterilizing the feeders will lead to a build-up of bacteria in the feeders which can prove to be fatal for the chicks.
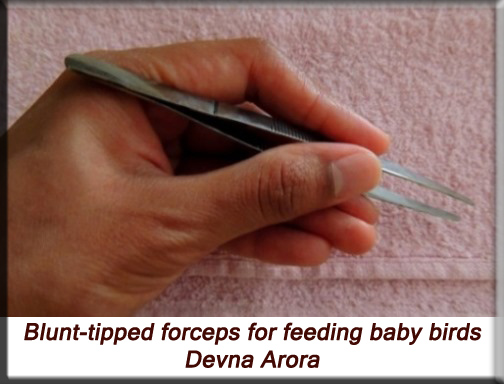
A pair of blunt-tipped forceps is ideal for feeding older chicks. These are easy to use, comfortable for the chicks and extremely easy to clean. They only need to be washed with soap and water after the feed.
Feeding instructions
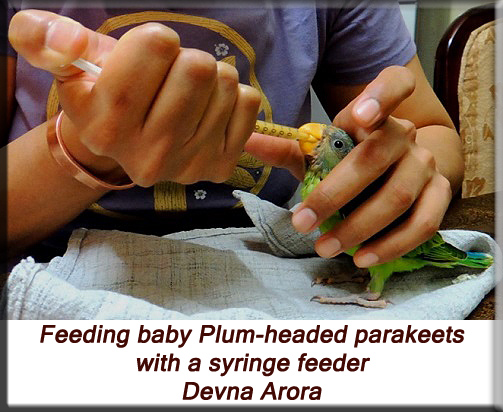
The chick can be placed on a napkin or paper towel on a table so you can feed the chick in a comfortable position – this is vital when feeding the chicks with a syringe. You can also feed the chick when it’s in the basket but all spilled food must be picked up immediately, often necessitating the bedding to be changed after the feeds.
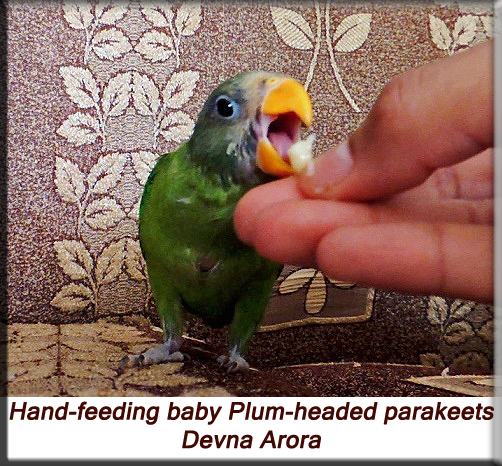
The chicks open their mouth as soon as the feeder approaches them. If not, you may gently tap on the chick’s beak to stimulate begging and feeding. Even though they do not suckle, parakeet chicks that are being syringe fed will slowly swallow the formula much as mammalian young do. Most chicks will have a crop-full in one sitting, then beg for the next feed only once the crop empties but some chicks may prefer having smaller quantities at a higher frequency – feeding must be adjusted to the chicks requirements and preferences. Force feeding or over feeding can cause the formula to flow into the throat and down its windpipe, which can be life threatening and must be prevented. You must ensure that the crop empties at least once a day – typically during the night.
N.B. Plum-headed chicks are a little difficult to understand as they scream both when they are hungry and when they have had enough. Typically, the begging calls will be short calls turning to ‘tooi tooi’ once the chicks are older. Once the chicks have had a tummy full and want to be returned to their baskets, the protest calls begin – these are comparatively longer in duration and more guttural than the begging call. Once fed a tummy full and returned to their baskets, many coo with contentment.
The beak and feathers must be gently wiped with a moist cloth after feeding them. Leaving any food residue will attract ants that can pose a fatal threat to young babies.
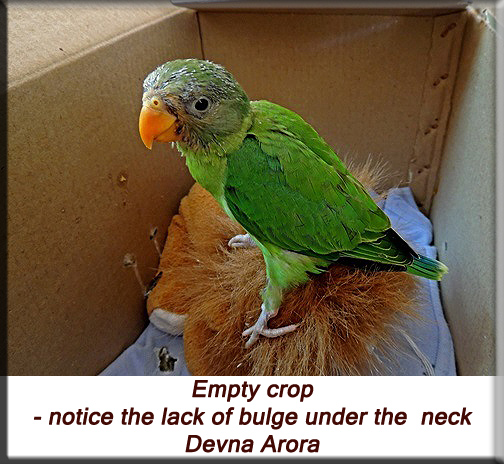
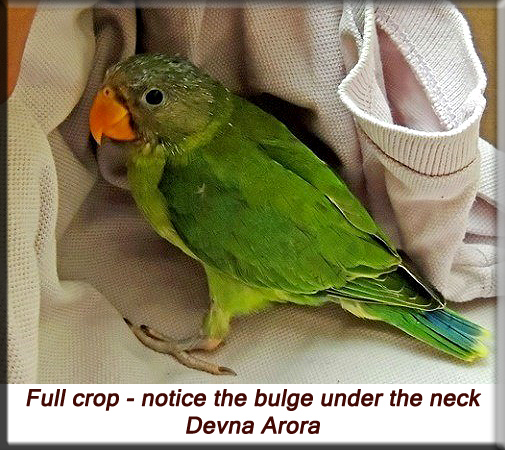
Empty and full crop
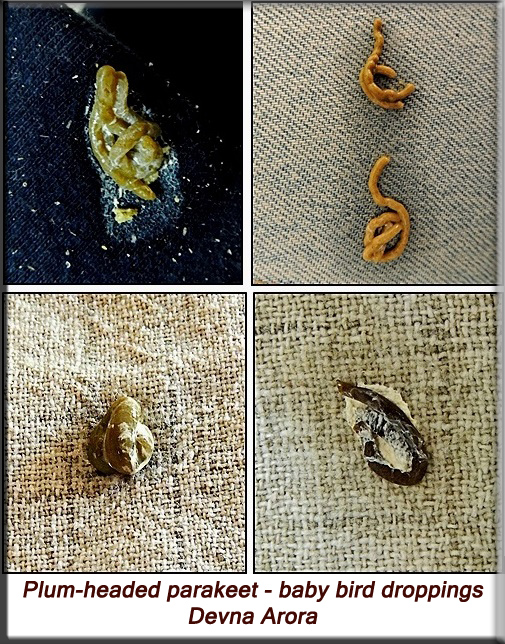
Baby bird droppings
Baby bird dropping can vary considerably in colour and consistency depending upon the feed given. Droppings that are well-formed, with or without white splatters, are a good sign but pasty or watery droppings are definitely not a good sign and the diet must be rectified immediately. Below are some examples of healthy droppings.
Water: drinking and bathing
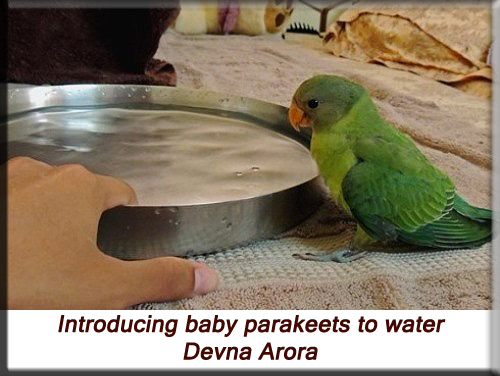
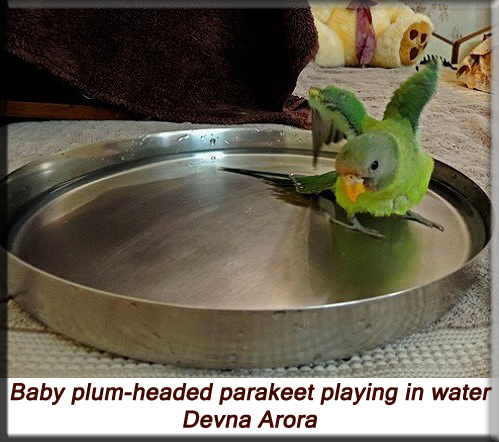
Parakeets are instinctively attracted to water, be it water baths, bowls, mist sprays or fresh rain. They must be introduced to water once they have fledged. They will also start drinking water at this stage and a bowl of fresh drinking water must be available for them at all times. Birds in semi-open enclosures also enjoy playing in the rain and are a real treat to watch.
Sleeping
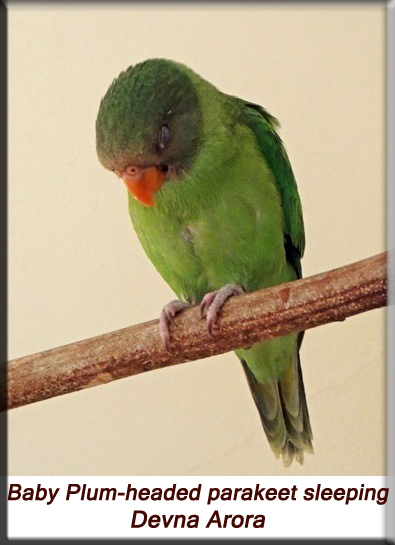
While younger birds sleep with their head drooping low, older birds (after 2-3 months of age) usually sleep with their head tucked into their backs. In most cases it will be birds that are greatly disturbed or insecure that will not be confident to tuck their heads but instead prefer to sleep in a more alert position. Housing conditions of such birds must be modified to ensure peaceful and restful sleep.

Continue to Page 2: growth and corresponding care
Protocol published in 2013